Create a Custom React-native Component From a Native Java Component

In This Article, You will learn how to create a custom react-native component with a native java component with the help of a very easy example. We will be creating an ImageView in React Native which will render a native ImageView using the bridge. There are no limits for you to bridge the complete functionalities of a native component. As shown in the image below, the Image is rendered using the native component with an interface in react native.
Let’s get started | How To Custom React-native Component
Step 1 – Create a React Native project:
npx react-native init MyApp –template react-native-template-typescript
This command will create a react-native application with the name MyApp and with typescript configured. The project structure will look like this :

Step 2 – Open the project folder in webStorm or VSCode:
You can use any IDE like WebStorm or VSCode to open the project and start coding. If you don’t have any IDE, you can download vs code from here or Webstorm from here.
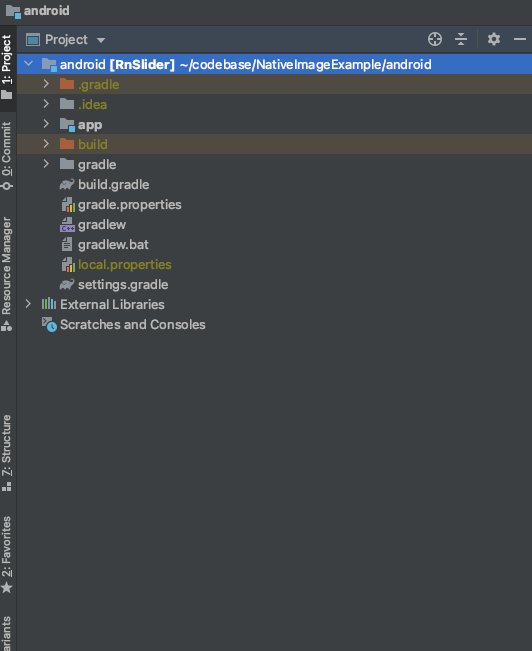
Step 3 – Open the android folder in the android studio:
Open the android folder of your react native project in android studio for writing some native code. Since the bridge involves native modules, you need to create some classes to implement different functionalities in your module. If you don’t have an android studio; then you can download it from here. Your project structure in android will look something like this:
Also Read | React Native Bridge For IOS
Step 4 – Create your ReactPackage class by inheriting React Package class:
Now, we need to create our react package class inside the app->src->[your package name]. I have created a package file with the name ReactImageViewPackage.java. Now you need to return a list from the createViewManagers method which will be the list of ViewManagers that you need for your ReactPackage. If you don’t want to create a UI component and just want to call some java methods, then you just need to create a java native module and return inside the createNativeModules method. This is because we are going to create an ImageView in react native using the native java class ImageView and Picasso.
public class ReactImageViewPackage implements ReactPackage {
  @Override public List < NativeModule > createNativeModules(ReactApplicationContext reactContext) {
    return Collections.emptyList();
  }
  @Override public List < ViewManager > createViewManagers(ReactApplicationContext reactContext) {
    return Collections. < ViewManager > singletonList(new ReactImageViewManager());
  }
}
Step 5 – Create your ViewManeger class by inheriting SimpleViewManager :
Now we need to create our ViewManager class by inheriting the SimpleViewManager class. Here are several features that you can use inside this class like @ReactProp(name = “URL”) for receiving props from react native side. We will override this method and will return to our View from here createViewInstance. As shown in the code below- SimpleViewManger is a Singleton class so create all the logic inside the View Component.
class ReactImageViewManager extends SimpleViewManager < ImageView > {
    >
    2 | public static final String REACT_CLASS = “RnImageView”;private Context context;
    @Override public String getName() {
      return REACT_CLASS;
    } |
    ^
    3 |
    4 |
    5 | @Override protected ImageView createViewInstance(ThemedReactContext reactContext) {
      this.context = reactContext;
      return new ImageView(reactContext);
    }
Here, in this class, we have inherited a SimpleViewManager<ImageView> where ImageView is the View that we want to return on the react-native side. We can use Our Views as well to make sure that the class has inherited the View class.
Also Read | React Native Bridge For Android
Step 6 – Register your package in MainApplication:
Now we need to link our package manually to the MainApplication.java. This will add our project to react native projects. Thereby, we can import it from react native side using javascript/typescript code. As shown in the code below:
private final ReactNativeHost mReactNativeHost = new ReactNativeHost(this) {
  @Override public boolean getUseDeveloperSupport() {
    return BuildConfig.DEBUG;
  }
  @Override protected List < ReactPackage > getPackages()
  {
    @SuppressWarnings(“UnnecessaryLocalVariable”) List < ReactPackage > packages = new PackageList(this).getPackages();
    packages.add(new ReactImageViewPackage());
    return packages;
  }
  @Override protected String getJSMainModuleName()
  {
    return“ index”;
  }
};
In the code above, we have added an object of our package, that is- ReactImageViewPackage. The code is already generated during the project creation. You just need to add this one line manually- packages.add(new ReactImageViewPackage());.
Step 7 – Create methods for React Props:
Now, you can create any number of methods inside your view manager class, that is- ReactImageViewManager in this case. As shown in the code below, you get the instance of the view and the value of the prop from the native side and you can do whatever you want to do with this view and variable instance.
Also Read | JavaScript Compiler Improved Google Chrome 91
@ReactProp(name = “url”) public void setUrls(ImageView view, @Nullable String url) {
  if (url == null) return;
  Picasso.with(context).load(url).into(view);
}
Here is the code above- where we are getting an Instance of ImageView and a URL from the react-native side. So, now we are just calling Picasso to load the given URL into the given ImageView.
Step 8 – Use Picasso for loading images in ImageView:
As you can see from the code above, we have used Picasso, which is a third-party library to load the image into the ImageView. As shown in the code below:
dependencies { implementation ‘com.squareup.picasso:picasso:2.5.2’}
You have to add Picasso dependency with the latest version as shown in the code above, inside the app-level build. gradle file. There may be other dependencies as well but don’t remove them. This example snippet is just for the sake of convenience.
Step 9 – Create a React Native Component and Connect it with the Native Component:
Now we need to create our react native component which will link to this native component. You can use this react native component anywhere inside we react native project. We don’t need to implement the styling part separately because the SimpleViewManager class handles it implicitly; you just need to do react-native styling as we do for other react-native components. As shown below:
Also Read | TabView in React Native | A Complete Overview
import React from ‘react’;import {requireNativeComponent} from ‘react-native’;
export interface INativeImageProps { url: string; style:any;}
export class NativeImage extends React.Component<INativeImageProps> { render() {   return <NativeImageView {…this.props} />; }}
const NativeImageView = requireNativeComponent(‘RnImageView’);
Here requireNativeComponent(‘RnImageView’); is used to connect the Native component with react native component. Hurray!! Your custom reacts native component is ready to be used.
I have used it like the below snippet:
import React from‘ react’;
import {
	SafeAreaView
} from‘ react - native’;
import {
	NativeImage
} from‘. / src / ReactViewPager’;
const App = () => {
		return ( < SafeAreaView style = {
					{
						flex: 1,
						backgroundColor: ’black’
					}
				} > < NativeImage style = {
					{
						flex: 1
					}
				}
				url = {
					‘
					https: //cdn.vox-cdn.com/thumbor/CoDA71sGX9lAX1rXC’ +         ‘cwtLCT91BY=/0x0:4500×3214/920×613/filters:focal(185’ +         ‘7×436:2577×1156):format(webp)/cdn.vox-cdn.com/uploads/chorus_image/image/69377458/1232945457.0.jpg’       }     />   </SafeAreaView> );};
						export default App;
10. Here is a bonus for developers who want to do more with this:
If you want to pass a callback from react native side and call it from the native side, you can do it like this inside ReactImageViewManager.
@ReactProp(name = “url”) public void setUrls(ImageView view, @Nullable String url) {
  if (url == null) return;
  Picasso.with(context).load(url).into(view, new com.squareup.picasso.Callback() {
    WritableMap event = Arguments.createMap();
    @Override public void onSuccess() {
      emitEvent(event, ”onSuccess”, view.getId());
    }
    @Override public void onError() {
      emitEvent(event, ”onError”, view.getId());
    }
  });
}

@Overridepublic @NullableMap < String, Object > getExportedCustomDirectEventTypeConstants() {
  MapBuilder.Builder < String, Object > builder = MapBuilder.builder();
  builder.put(“onVideoChange”, MapBuilder.of(“registrationName”, “onVideoChange”));
  builder.put(“onEndReached”, MapBuilder.of(“registrationName”, “onEndReached”));
  return builder.build();
}

private void emitEvent(WritableMap eventData, String eventName, int viewId) {
  context.getJSModule(RCTEventEmitter.class).receiveEvent(viewId, eventName, eventData);
}
In the code snippet from ReactImageViewManager above, when we receive a URL prop from the react-native side, we are loading the image into ImageView, and also pass the success and failure callbacks. Inside these callbacks, we are calling the emitEvent method with different arguments. EmitEvent has three parameters-
1)eventData that we can send as an argument inside our react native callback;
2) eventName is the name of the callback on react native side;
3) viewed is the uniqueId of the view in case multiple instances have been created inside of react native code.
But first, we need to register our callbacks with the view manager for that we will override getExportedCustomDirectEventTypeConstants. We will add our callBack names as builders.
put(“one reached”, MapBuilder.of(“registrationName”, “onEndReached”));
Now, put these callbacks in react native side to use them when they are triggered.
Also Read | Guide to WordPress Plugin Development
Change your interface to become like this even if you are using typescript :
export interface INativeImageProps {
	url: string;style: any;onSuccess: (data: any) => void;onFailure: (data: any) => void;
}
And also pass them from the component when you are calling the component like this:
< NativeImage onFailure = {
	(data: any) => {
		console.log(data.nativeEvent);
	}
}
onSuccess = {
	(data: any) => {}
}
style = {
	{
		flex: 1
	}
}
url = {
		‘
		https: //cdn.vox-cdn.com/thumbor/CoDA71sGX9lAX1rXC’ +   ‘cwtLCT91BY=/0x0:4500×3214/920×613/filters:focal(185’ +   ‘7×436:2577×1156):format(webp)/cdn.vox-cdn.com/uploads/chorus_image/image/69377458/1232945457.0.jpg’ }/>
Here is, the data. native event has the writableMap that you have passed from the Native Side.
FAQ's
What is React Native?
React Native combines the best parts of native development with React, a best-in-class JavaScript library for building user interfaces.
Is React Native Popular?
Among the top 500 apps in the US, 14.85% of installed apps are built with React Native. In fact, in the category of top US apps, React Native is the third most popular framework, right after Kotlin and Android Architecture Components.
How to understand React native?
React Native is like React, but it uses native components instead of web components as building blocks. So to understand the basic structure of a React Native app, you need to understand some of the basic React concepts, like JSX, components, state, and props.